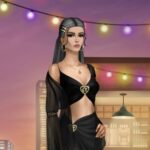
The Pocket Styler Studio has preset shadows that are a great base for the overall look of your item, but customizing shadows and using folds can add a lot more depth and help elevate your piece.
1. Adding base shadow
After you’ve created the shape of your item you can choose a base shadow that fits best for how you want your fabric to look.

2. Customizing the shadow
Select the layer shadow, then go to the pencil at the top and select the brush.

To determine your brush you can play around with 5 categories. Since the size is pretty obvious, I will explain the other 4.
Put the hardness on the lowest setting if you want a more faded shadow and on a higher setting if you want a sharp shadow.


I usually put the spacing as low as possible to avoid patchiness.


The difference between the opacity and flow is that opacity will make the whole brush less visible while the flow will make it less visible near the edges.


I wouldn’t recommend detailed drawing in the shadows, I personally use this more to add some bigger shadows and then add folds for the details. (So I tend to put the hardeness and spacing on the lowest and the flow somewhere in the middle for a subtle shadow.)
3. Adding and manipulting folds
Select the pencil again, then go to decor and click on folds. Choose a fold that most resembles the shape you need (the size doesn’t matter because you can resize and stretch them). It can help to look at real garments to see where you might need extra folds to bring some movement to your item.

For the dark and light part of a shadow it can also help to look at the light on your doll. For example, with this sleeve: if you look at her arm, the part in the center, which is also the part that’s most to the front catches the most light. So for the fold on the shoulder I try to follow that logic: most to the front, more likely to catch the light.


I usually manipulate the folds a lot, it helps to play around a bit because sometimes you find what you need in a fold you didn’t expect before you started manipulating it.


