


Welcome to detailed guide on how to enhance your outfits in Pocket Styler by adding belt loops to pants or skirts! Follow these steps to master this stylish look and achieve a perfectly polished outfit. Each step is easy to follow, and screenshots will be provided to help guide you.
Step 1: Find Your Strap
To start, you’ll need to find the strap pieces. The game provides two types:
- A longer strap for the left side
- A shorter strap for the right side
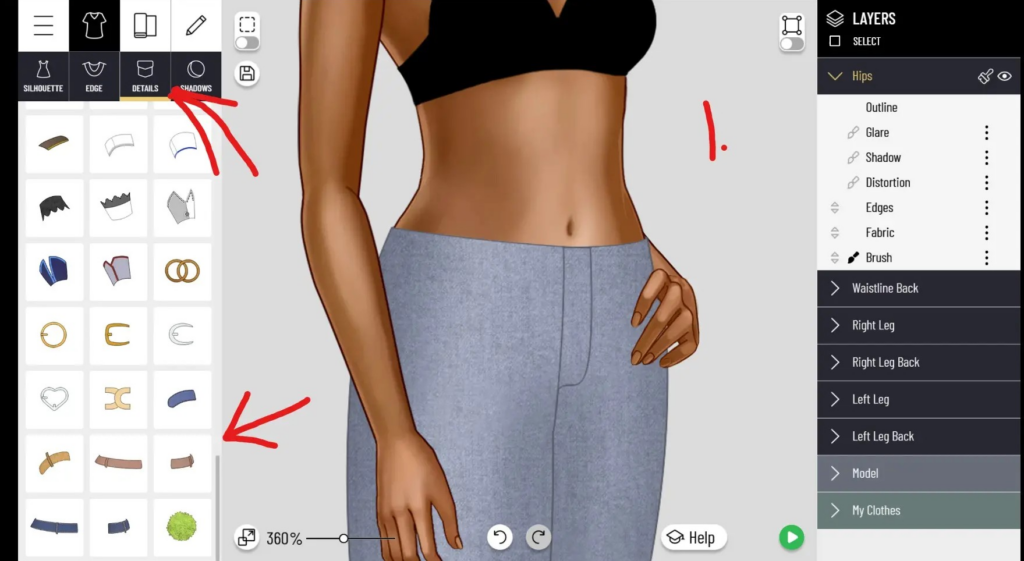
Tip: Look for these in the details section, where accessory options are stored.
Step 2: Crop the Strap to Fit Using “Crop by Main Layer”
Use the “Crop by Main Layer” (represented by the scissors icon) to fit the straps perfectly onto the pants or skirt. After cropping, you’ll need to adjust the straps:
- Use the points and lines tool to fit the first strap (left).
- For the second strap (right), extend one side so that it overlaps slightly with the first strap, creating a realistic crossing effect.
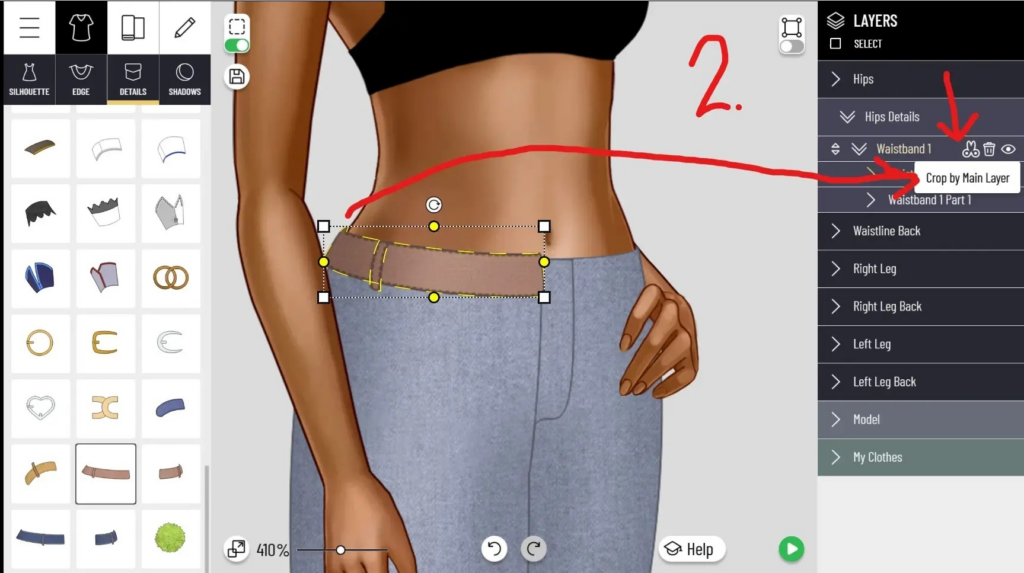
Tip: Make sure the extended strap leaves room for the button placement in a later step!
Step 3: Add a Zipper Area Using the Pocket Detail
Want to add some extra flair to your outfit? Head to the pockets section and find a detail that looks like a strap to create the illusion of a zipper area.
- Place this strap in the zipper section and adjust it so that the bottom part angles slightly for a more natural look.
- Ensure this strap layer is underneath the waistband layer, so it doesn’t sit on top of the pants.
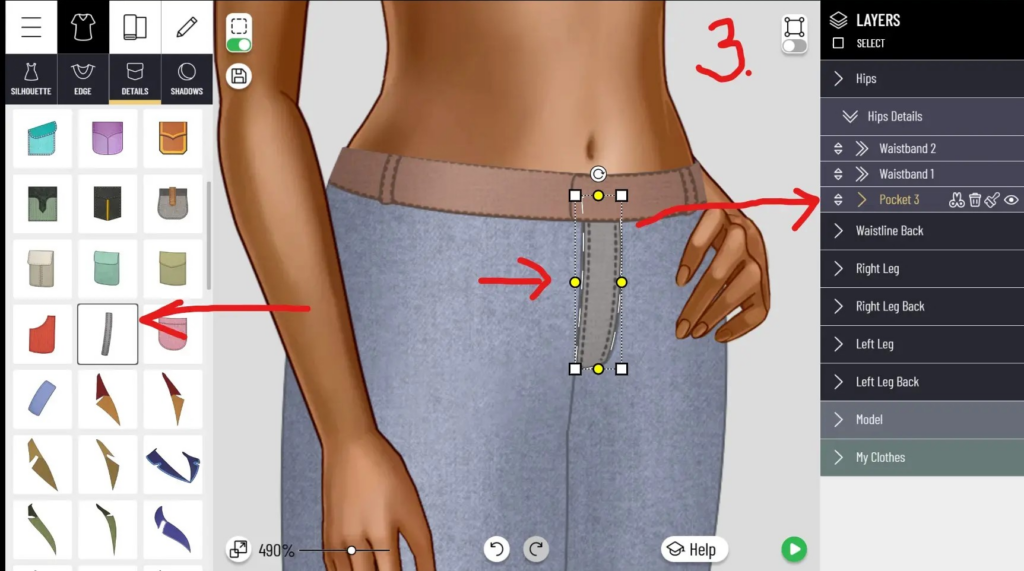
Tip: Use the layering tool to move the pocket detail below the waistband for a realistic finish.
Step 4: Match Colors with the Paint Brush Tool
Head to the hips section and select the paintbrush icon to “Clone Style.” This will help ensure the details match the fabric of your pants or skirt.
- Click on the paintbrush, then tap on each layer of the belt loops and zipper area to clone the colors from the main fabric.
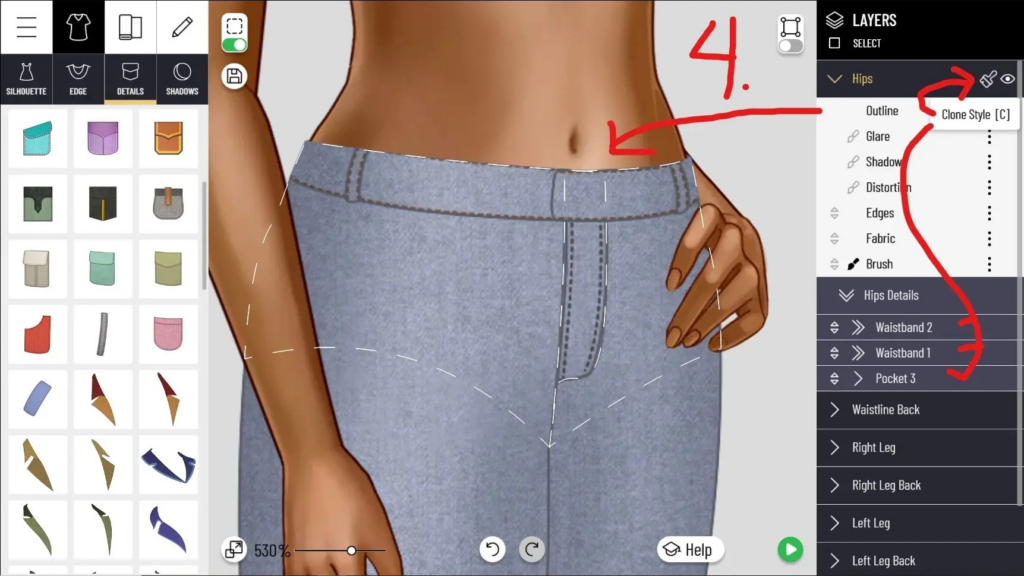
Tip: Cloning style ensures the straps blend seamlessly with the overall look.
Step 5: Add a Button to the Waistband
It’s time to add the finishing touch! Choose a button from the detail options and place it where the two straps overlap on the waistband.
- Position it so that it looks like it is fastening the two belt straps together.
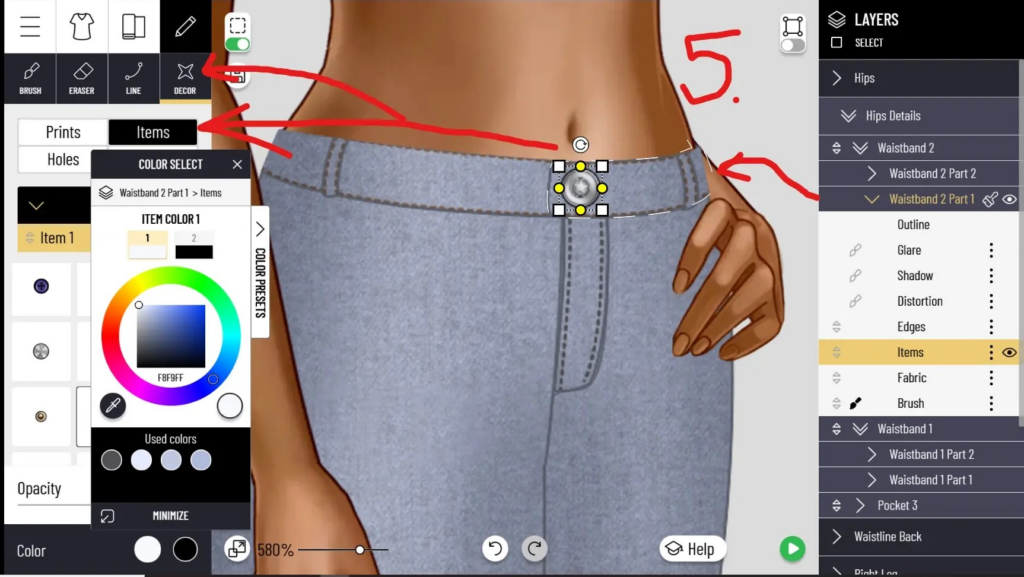
Tip: Use the points and lines tool to adjust the button size and placement for the most realistic effect.
Step 6: Shade Your Straps
For a truly professional look, don’t forget to add shading to the straps.
- Use the shading tool to add depth and dimension, making the belt loops look more realistic.
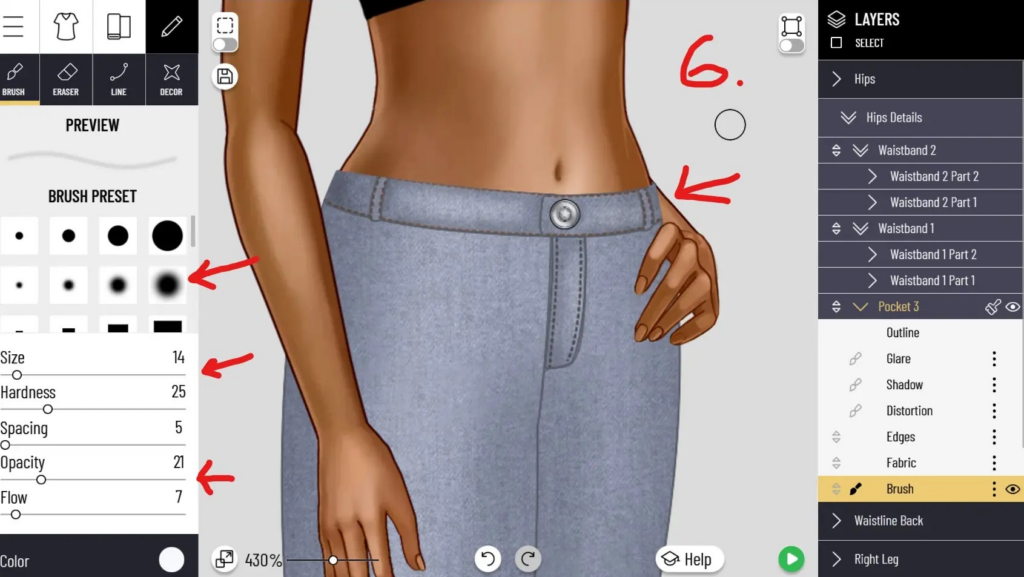
Tip: Shading is key to giving your outfit a polished, high-end feel.
Follow these steps to customize and enhance your looks in Pocket Styler! With a little practice, you’ll be able to add belt loops, zippers, and buttons like a pro, creating stylish outfits that will impress the entire fashion community.


