


This is a straightforward, beginner-friendly tutorial designed to help you enhance your garments with shadows and highlights. By following this guide, you’ll be able to make your clothing items stand out with more dynamic and realistic shading. If you’re unsure of where to add shadows and highlights, always refer to the Pocket Styler official designs in-game for guidance.
Why Shadows and Highlights Matter
Each garment in Pocket Styler has the potential for unique and vibrant design. Using the default settings will only give you flat, basic garments. To take your styling to the next level, you’ll need to manually paint shadows and highlights, which will create depth and make your creations pop!
Basic Tips Before You Start
- Study the Game’s Garments: Refer to in-game clothing designed by the official artists, especially for darker colors and multi-patterned items.
- Practice with Detail Squares: Begin by practicing on detail squares. Use the brush tool with your own opacity and flow settings to get comfortable before applying your skills to full garments.
- Work with Three Tones of Color: Use a dark color, a mid-tone (main) color, and a highlight color. For added contrast, incorporate one extra-dark shade and one extra-light color to make the edges pop.
The Purple Skirt Guide: Step-by-Step Process
Let’s walk through the process of painting shadows and highlights using a purple skirt as an example.
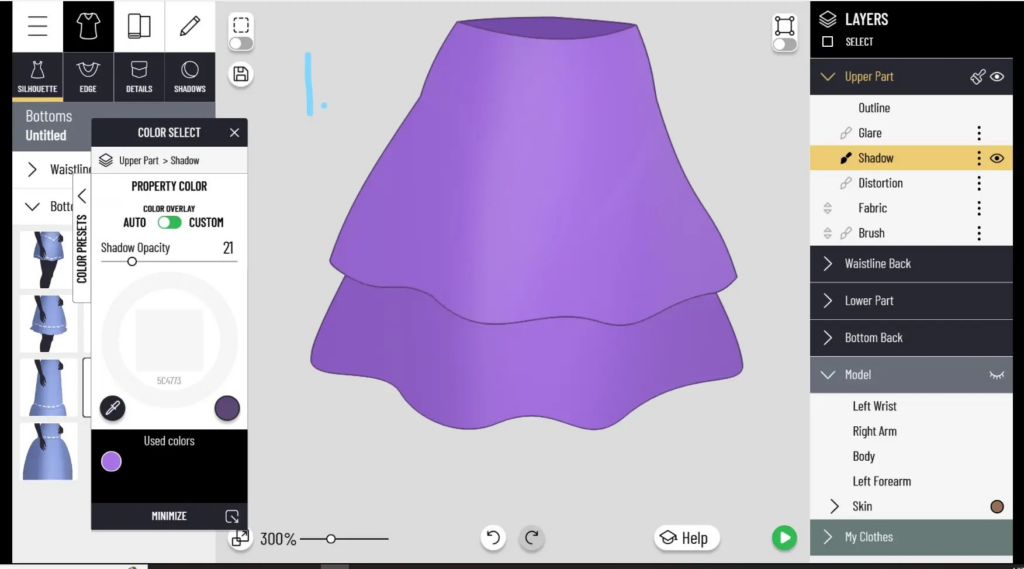
1. Start with a Foundation Color
Begin by laying down the base color of your garment. After that, reduce the opacity of your shadows layer to about 30%. Create new brush layers and place them above the glare layer.
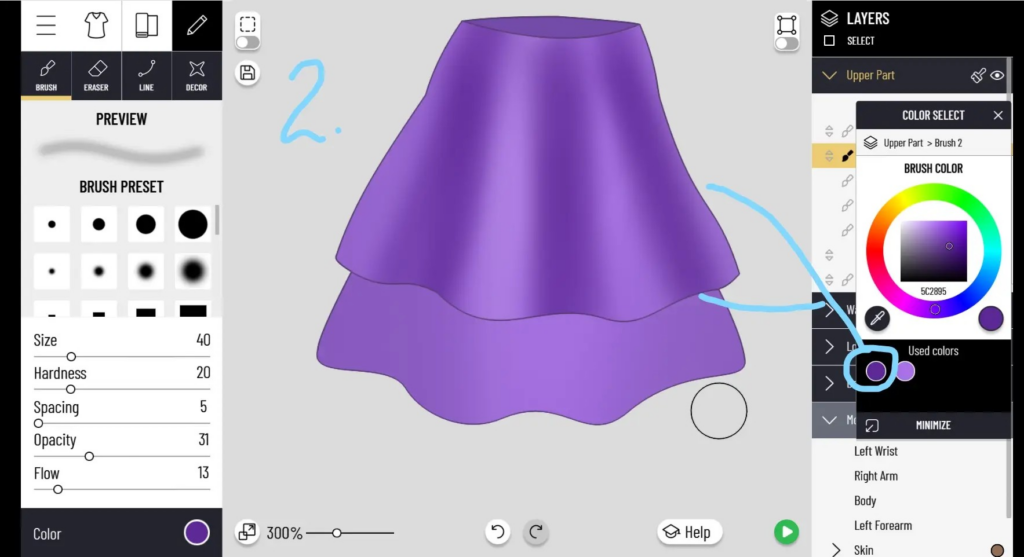
2. Apply the Darkest Color to Define Curves
Using your darkest color, trace the natural curves and folds of the fabric. This will form the shadowy areas where the material dips and bends.
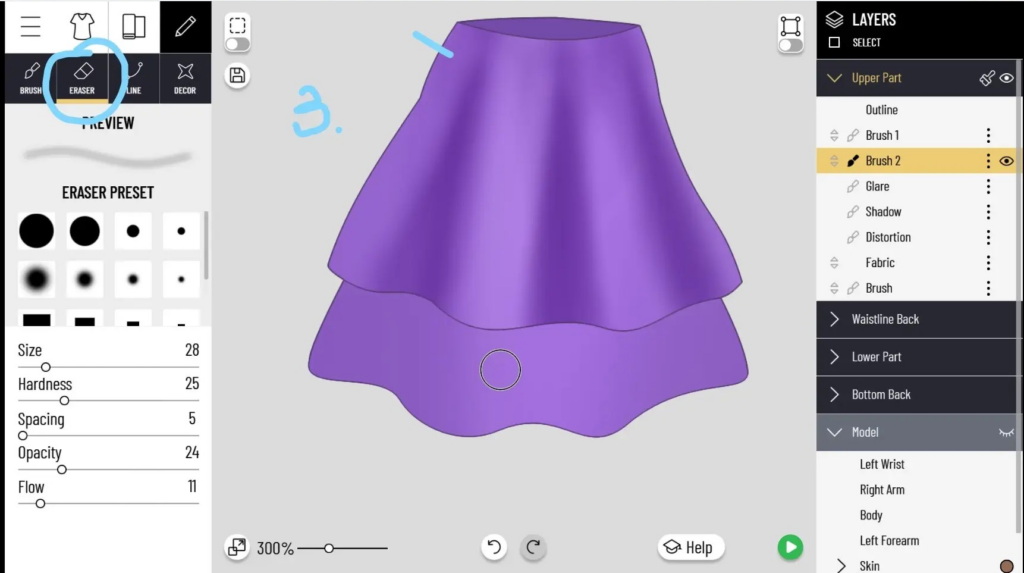
3. Clean Up with the Eraser Tool
Once you’ve applied the shadows, use the eraser tool to tidy up any edges. If the dark shade is too intense, use the eraser to lighten it instead of starting over.
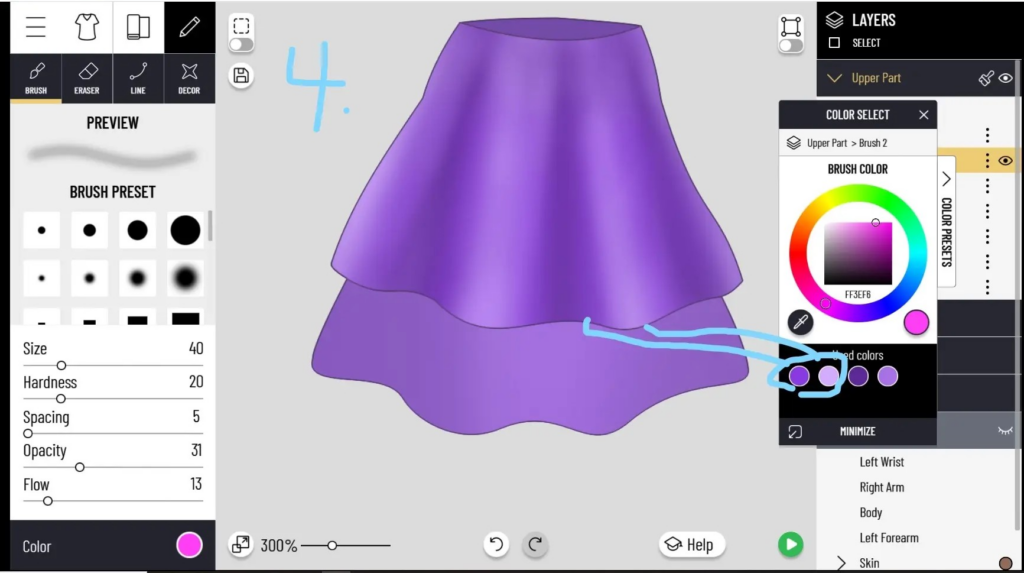
4. Add Highlights
Next, paint highlights on the raised areas of the folds, giving the fabric a sense of depth. Between the darkest and lightest areas, blend in your mid-tone color to smooth the transitions and create a more realistic gradient.
5. Repeat for Additional Layers
If your garment has multiple layers, make sure to apply shadows to the lower layers as well. The top layer should cast a shadow on the bottom one, creating the illusion of depth.

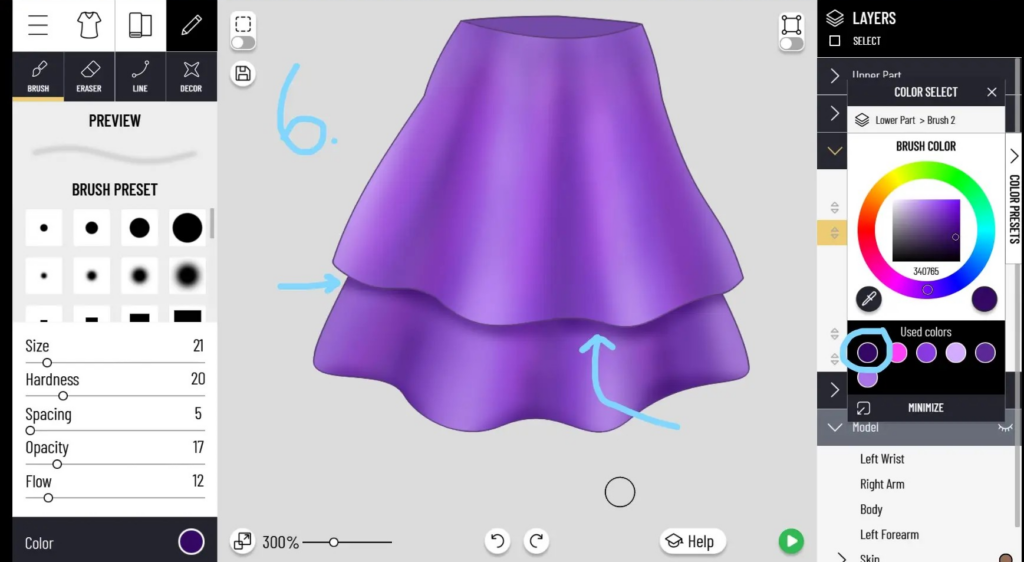
6. Overlapping Layers: Undershadow
Don’t forget to create an undershadow for any overlapping layers. This will emphasize the depth between different parts of the garment, making it look more three-dimensional.
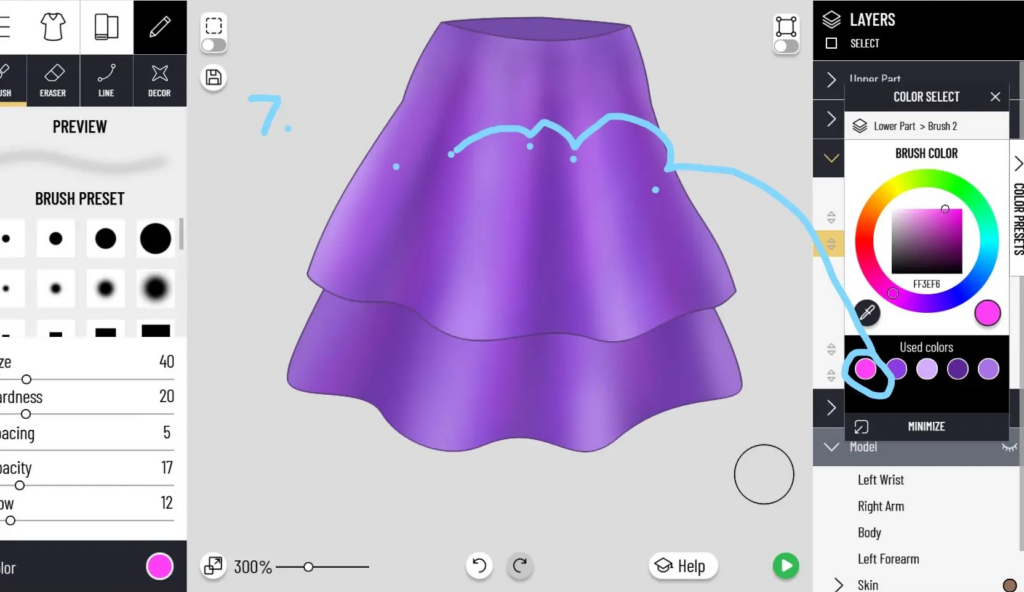
7. Evaluate Your Work and Adjust Colors
Take a moment to review your coloring. If the garment still looks flat, consider adding a dusting of a bright, complementary color (e.g., pink, aqua, yellow) to enhance vibrancy and contrast.
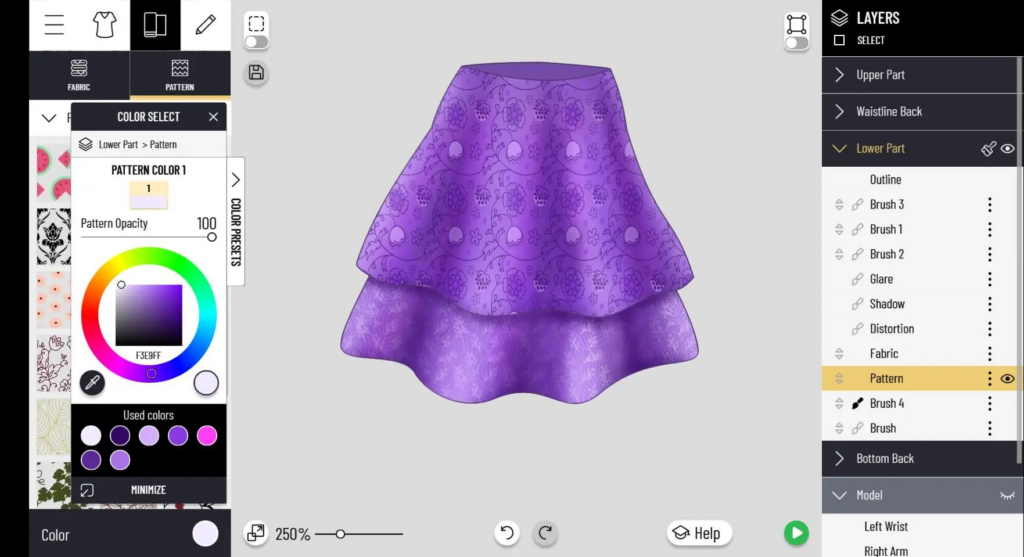
8. Play with Patterns and Textures
Add patterns to bring more dynamic elements into your design. If your pattern feels like it’s floating on top of the garment, use a new brush layer to blend it in with shadows and highlights.
Final Thoughts
This guide covers the basics of shading and highlighting to add depth to your garments in Pocket Styler. The key is to practice! Grab those detail squares, work on getting your brush strokes right, and don’t be afraid to experiment with colors and patterns.
If you have any questions or tips of your own, feel free to share with the community.
Happy styling!


