


Welcome to the Pocket Styler Studio tutorial on Easy Item Recoloring! This guide will show you how to quickly change colors on a pair of custom-designed shoes, allowing for easy experimentation with new color schemes without starting from scratch. Perfect for designers looking to refresh their creations with just a few simple adjustments.
Whether you’re a beginner or a seasoned designer, this guide will help you add variety to your creations quickly and easily.
Step 1: Set Up Your Design
- Choose the Base Item: Start with a pair of shoes (or another item) you’ve designed and want to recolor. In this example, we’ll work with a pair of green boots.
- Select a New Color Scheme: Decide on the new colors you’d like to use. We’ll switch to a bright lilac with crimson undertones for a fresh, vibrant look.

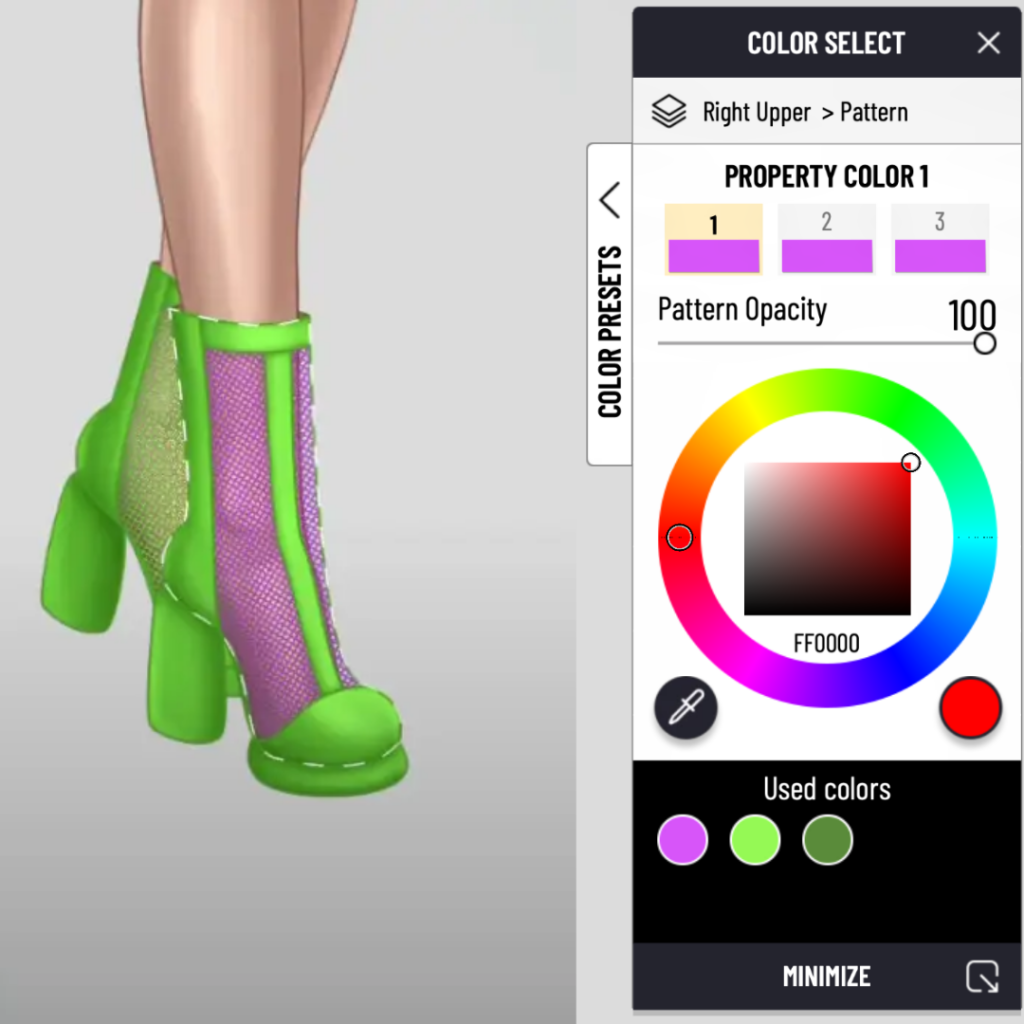
Step 2: Start with the Color Wheel
- Open the Color Wheel: Use the color wheel tool to select the primary and secondary shades for your item.
- Assign Colors to Elements: Go through each element of the shoes and assign the desired colors. For our boots, we’ll select three shades of lilac to give a nice gradient effect.
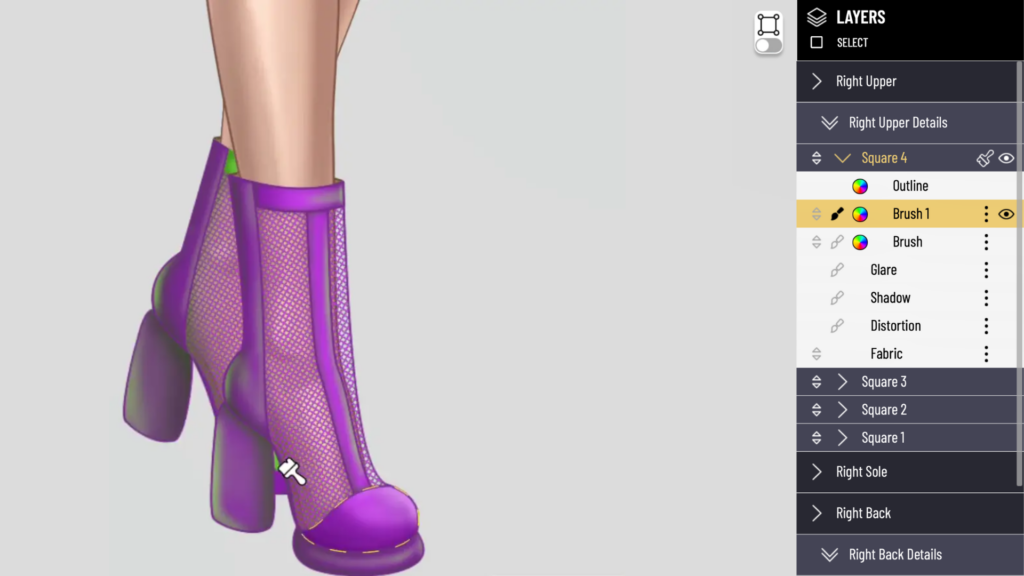
Step 3: Adjust Layers and Add Shadows & Highlights
- Select Each Layer in Order: Begin by selecting the different layers of your design. For shoes, you’ll typically have layers for the main fabric, mesh, sole, and details.
- Add Shadows and Highlights:
- Bottom Brush: Use this brush for shadows. Choose a slightly darker shade of your base color to create depth.
- Top Brush: This brush adds highlights. Select a lighter tone of your base color for these areas to make the design pop.
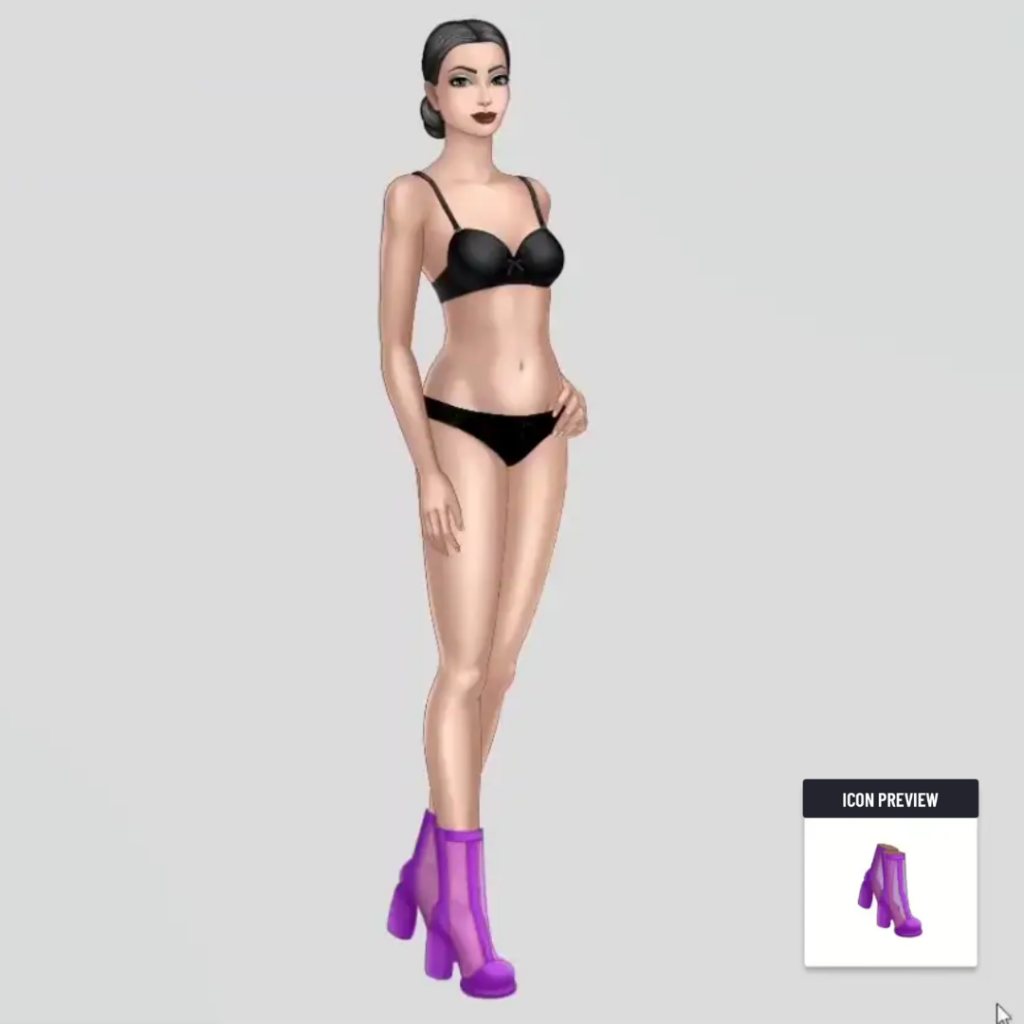
- Check the Preview: After each adjustment, use the preview option to see how the colors and effects look together. In our example, lilac looks striking alongside green, but you can continue working in one tone if desired.

Step 4: Add Outlines to the Mesh
- Outline the Mesh: To make the design more cohesive, add an outline around the mesh elements using your selected color. This can be done by copying the mesh layer and applying the outline effect to each section.
- Copy Colors Across All Parts: Make sure to apply the same color outline to all front and back sections of the shoes. This will help the entire design appear unified.
Step 5: Final Touches on Shadows and Highlights
- Refine Shadows and Highlights: Go through each section (front, back, sides, and sole) and apply the same shadow and highlight technique as in Step 3.
- Preview the Final Design: Once all layers have been colored and highlighted, go to the preview to see your final design. Make any last adjustments if needed.
Step 6: Save and Publish
- Save Your Design: Once you’re happy with the final look, save your design in Pocket Styler Studio.
- Upload to the Game: Send the shoes into the game and list them for sale. Your new color variant is ready for players to purchase!
Final Thoughts
By following these steps, you can quickly and easily create multiple color versions of your designs without starting from scratch. Experiment with different color combinations to make your items stand out in Pocket Styler!
Happy designing!


