


Hello, Pocket Styler creators!
This guide covers how to make and apply custom prints to clothing items in Pocket Styler Studio. Follow a simple, repeatable process to create unique patterns and transform in-game outfits. Let’s dive in!
Step 1: Preparing Your Custom Print
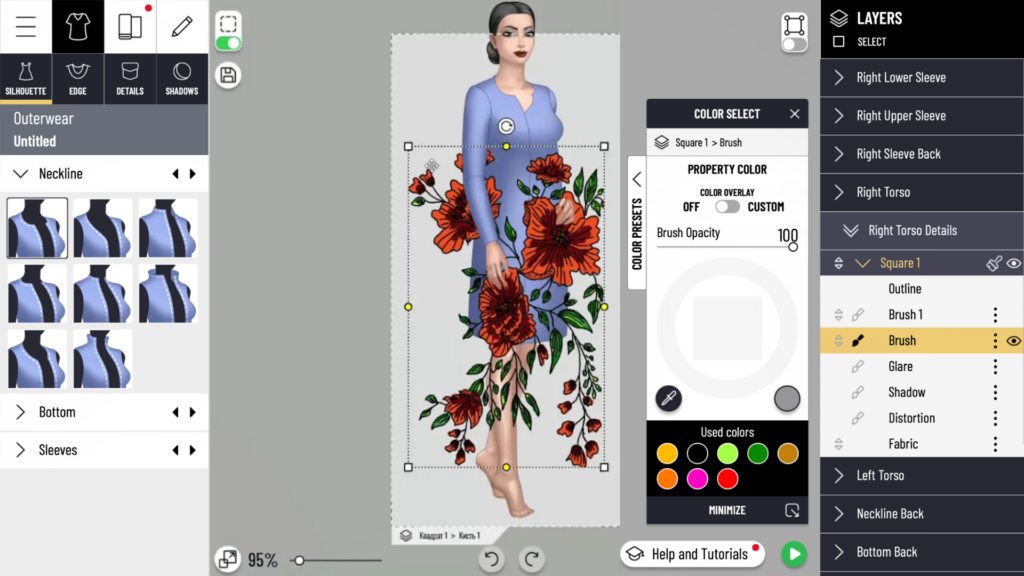
- Create a Transparent Square Canvas:
- Start with a transparent square canvas where you’ll design your custom print. This square will serve as the base for the print, which you can later apply to different parts of the clothing.
2. Draw the Print Design:
-
- On this transparent square, add the details of your print. For this example, let’s say you’re drawing a floral pattern. You can use a brush to create flowers or any other design elements.
- Adjust the size and arrangement of your elements within the square until you’re happy with the design.
3. Copy and Adjust the Print:
-
- With your design complete, you can duplicate and resize elements within the square to fully cover the area. However, this step is optional if you prefer a minimal or centered print.
Step 2: Applying the Print to Your Item
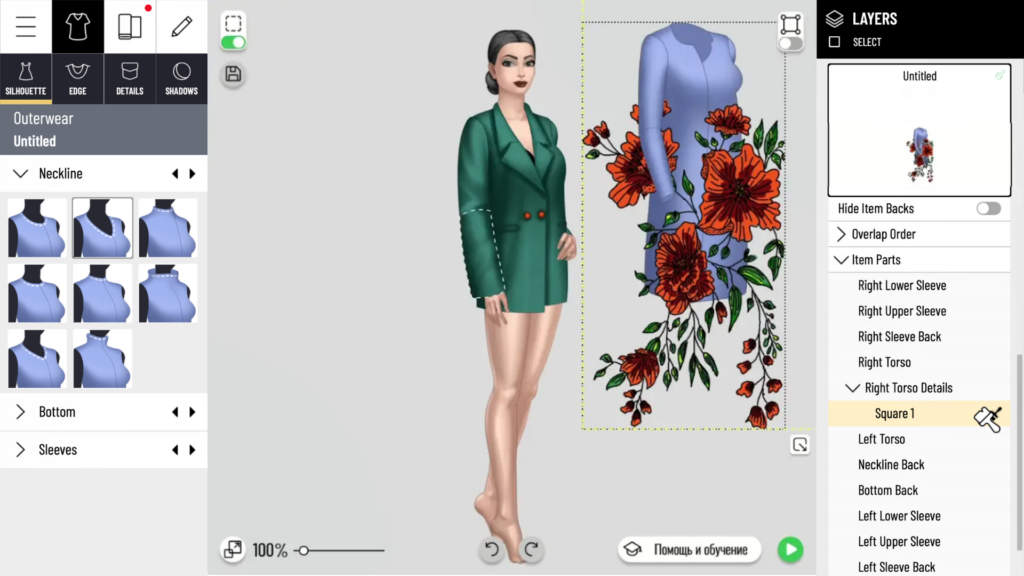
- Identify the Clothing Part:
- Decide where you want to place your print on the clothing item. For instance, you may want to apply it to the sleeves, torso, or any other part.
2. Transfer the Print:
-
- Go to the section of your project where you created the transparent square with the design.
- Select the part of the clothing where you want the print (for example, the right sleeve or torso) and copy the design from the square canvas.
- Paste the copied design onto the selected clothing part.
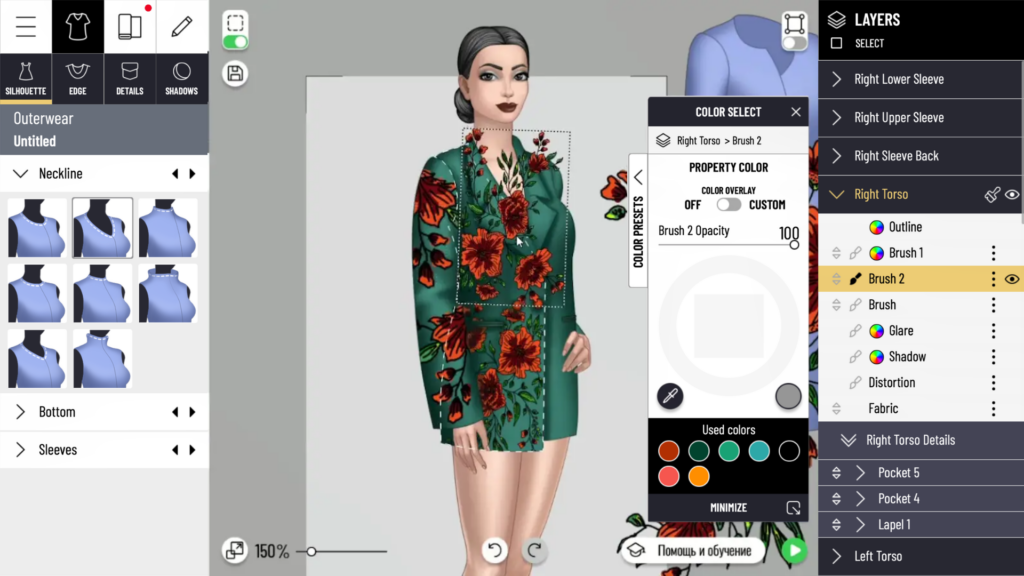
3. Adjust and Transform:
-
- Use the “Transform” tool to resize and position the print on the clothing part. Align the design so it looks natural and seamless. If needed, you can reflect or rotate the print to better fit the item’s shape.
4. Repeat for All Parts:
-
- Continue this process for each section where you want the print to appear. Copy the design from the square and apply it to the different sections of the clothing.
- For consistent placement, use “Transform” to scale and align each piece of the print.
Step 3: Final Touches and Viewing the Print
1.Combine Brushes for a Cohesive Design:
- Once you’ve applied the print to all desired parts, group or merge the brushes (depending on the Studio’s options) to keep the design unified.
2. Preview the Finished Design:
- Close and reopen the design to see how the print looks on the entire clothing item. Make any final adjustments as needed.
3. Limitations:
- Keep in mind that the custom print technique works best for clothing items like jackets and coats. Unfortunately, it may not display correctly on belts, bags, or shoes due to cropping or alignment issues.
And that’s it! With this guide, you can create and apply custom prints to bring a unique touch to your Pocket Styler designs.
Happy styling!


